WELCOME!


It is hard to believe that it was almost ten years ago I witnessed a CNC router in action for the very first time. I was fascinated with what I saw and simply had to have one! Although I had been in the creative end of the three dimensional sign business for most of my life I didn't really know what I would do with one - but I just knew it could do fantastic stuff.

Through extensive research and LOTS of hands-on practice I quickly found out that my MultiCam router was capable of just about anything imaginable.This journal will chronicle that journey to date and continue each week with two or three entries as I continue to explore just what is possible with this wonderful tool... -dan

Tuesday, October 10, 2017

Tank turret


The next part of the tank we are building is the main turret.  It is pretty simple but it uses tools in ways not often done. The turret is built in two pieces - an upper and a lower half.

The first step is the create a relief using the bevel tool, but we'll do it with a twist. That is to use the limit to height tool which effectively flattens the top with a nice bevel around the edge.


The gun barrel mounts to the front of the turret and so we needed to build a box on the front. This is done as a separate relief. I made this 0.8" tall - just like each half of the turret.


The gun mount relief were then combined with the turret reliefs.


The two halves of the turret then got a round modification by using the ADD TO RELIEF command using the two circles as masks. These reliefs were created separately and then merged highest with their respective halves of the turret. The large circle is the top portion. We'll build a hatch onto it shortly.


That's all I can fit on this post but next time we'll build the final bits to get this ready for routing.

Monday, October 9, 2017

Why 30 lb Precision Board?

We use 30 lb Precision Board in our shop exclusively. I often get asked why and so I did up this little video for my answer. It is much quicker than typing...   :)   I first answered this question four and a half years ago...   here   and my answer hasn't changed.

Why I chose a MultiCam

When I was in Salt Lake City at the EnRoute Summit I was asked to tell the story of how and why I chose a MultiCam CNC router. This is a video of that story...


Saturday, October 7, 2017

Building a tank - part one


I find it a lot of fun to build rather complex files in EnRoute. They are both challenging and a great way to learn the functions of the software. Once mastered the functions of ADD, SUBTRACT, MERGE HIGHEST, MERGE LOWEST and REPLACE allows us to build some pretty interesting shapes to create just about anything we can imagine.

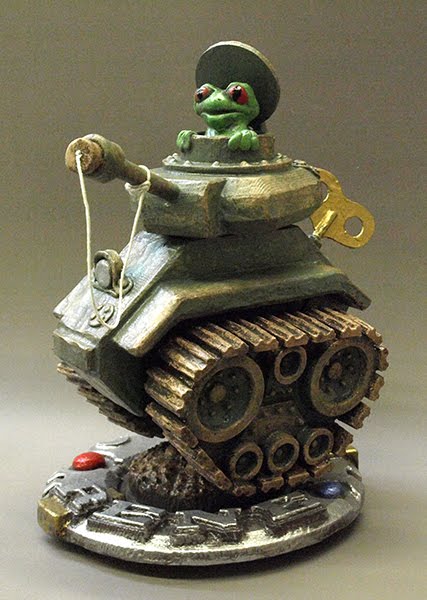
The second project we built at the Salt Lake City EnRoute Summit was a cute little tank. The tank was about eight inches tall. It was routed from many layers of 1" thick Precision Board.


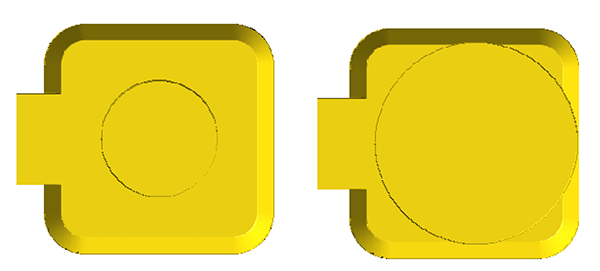
To build the tank you have to first figure out how many layers of routed Precision Board there will be and what is on which layer. I started with the track which will be built in a front and back layer for each side of the machine. I built the vectors in EnRoute. 

I started with a flat relief of the centre portion of the tread. I forgot to grab a screen capture of this step but as I recall it was 0.3" thick. The sprocket segments were next and these were added to the first relief to a depth of 0.2"


The raised boxes were next and these were created by modifying the base relief to a height of 0.2"


The wheels were next but because they overlapped the sprocket pieces they needed to be built as separate reliefs to a height off 0.6"


These separate wheel reliefs were then merged highest with the base relief.


The centre of the wheels was then depressed using the dome tool. I created a base of 0.1" (vertical sides) and an angle of 17 degrees. I also used the subtract from command.


I checked the front view in the non-rendered mode to make sure I had achieved what I wanted.


The wheel has were next. These were created by using the dome tool with the add to command.


Once more I checked in the front view to make sure I had what I wanted.


The lug nuts and rivets were the next order of business. I could do these all at once as they were all the same height. I used the dome tool to modify the base relief.


The cleats of the tracks were next, They were created as separate flat reliefs that were 1" tall. 


Once again I checked the front view to make sure they looked as I imagined they would when I pushed the enter key on my computer.


The track cleats were spaced off of the centre portion of the assembly just a hair which meant I had to do one of two things. My first option was to create a zero height relief and then merge highest with the separate elements. This is the option I did here.

In my workshop I nudged all the separate cleats towards the centre portion and because they now overlapped the centre relief I could combine them in one click using the combine relief function in EnRoute.


To facilitate the easy mounting of the tank track to the tank I created a rectangle which I used to make a 1" high separate relief. I then copied and flipped the tank track relief and positioned the block in the center of the inside half of the track. This was then merged highest with the track. 


Both the front and back tank track reliefs were duplicated as two copies of each were required. I could then tool path the reliefs and send them off the the MultiCam. As always we used 30 lb Precision Board. While the tank tracks were being routed I was busy building the files for the rest of the tank. Stay tuned for those steps...

Fishing boat relief - part two


To create the cab of the little boat I first created two zero height reliefs.


I opted to create meshes and then merge them to the relief, rather than modify the reliefs with the revolve tool. Either procedure would have worked in this case. I generally use this method as it allows me more freedom to adjust the height of things before locking it down by merging it with the relief.


The mesh shows red when selected, green when not. I was mostly happy with the result but decided it needed stretching both vertically and even more horizontally. I checked various views to make sure it was how I desired.


Once adjusted I selected the zero height relief and the mesh cylinder and merged highest using the appropriate tool.


When things are working properly the relief looks blotchy with the mesh still in place.


I was happy so I deleted the mesh.


I then used the second zero height relief to effectively clip the back of the fishing boat cab by merging lowest. The cab looked a little narrow so I stretched it towards the back of the boat and then nudged it forward until I was happy.


I then used the slice command to take off the zero height relief.


I was happy with the little boat at this stage and it was ready to tool path and send to the MultiCam except for the fact that it was four inches thick and our Precision Board was only two inches thick.


The solution was to use the slice tool once more to create two slices.


After the slice tool is used the top relief shows up.  This is on a different plane than the lower slice. The original relief is still in place and needs to be moved to the side.


Before routing I need to duplicate the two layers of hull and then flip them to form the other side of the boat.