The upper portion and motor base of the lectern stand was a challenging piece to build. There were a number of ways I could have handled it but I chose to do it with a combination of domed reliefs and one mesh. The piece we were building today was shaped a bit like a funnel with a horizontal tube in the middle and a lightbulb shaped thing on the top. An axle would go through the top part for the big gears and through the horizontal tube ('motor') for the smaller gears.
The round bulb was the first and easy relief using the dome tool.
The round horizontal shaft was next. Again I used the dome tool to create this relief. I would cut the rounded ends off later.
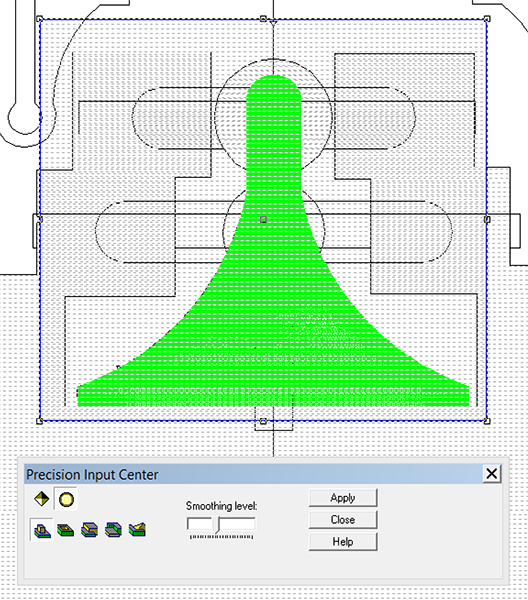
Next up was the side down funnel shaped base. The mesh tool was used for this shape. I drew out the vectors and then used the revolve tool to create the mesh.
A square zero height relief was quickly created. Then I selected this relief and the mesh to activate the combine tool. The other oddly shaped zero height relief was also created at the same time. I would use this relief (merge lowest) to clip the ends of the hot dog shaped relief to a square shape.
I then selected this new relief and merged highest with the lightbulb and the hot dog shape.
Once I had one relief I used the zero height odd shaped relief to clip the ends of the horizontal axle.
I then created a round (flat topped) relief which would form the horizontal motor. This too would be merged highest with the rest of the relief.
Since the horizontal motor would have some square tubing inserted down the middle I created a zero height relief for that and modified the base relief by merging lowest with that square shape.
The very complex shape was then finished. Now it was simply a matter of using the slice tool to create layers which would be routed singly and then glued back together after they were cut.
I duplicated and flipped one set so I had both halves of the funnel shaped base. I then aligned all of the pieces to the bottom of the plate and then nested them to fit tightly together. It was time for the MultiCam to do it's job whittling them all out of a 2" thick piece of 30 lb Precision Board.
Once the router finished cutting the pieces I started the assembly process. I first used our tables to cut channels into the back to accept the welded steel frame. I could have built jigs and allowed our router to do this task but it was quicker to just do this process by hand. The steel frame was laminated into the middle of the assembly.
I sourced some adjustable feet for the display. They are slightly smaller versions of the feet on our MultiCam - just one small detail to make this thing feel authentic. Our supplier was able to deliver in only a day!
Jack, our welder had been busy cutting steel and welding up a sturdy frame while I designed the cutting files for the inner plywood skin.
As always I fit the pieces at every stage to make sure it is all looking and working correct.
Next we'll begin working on all of the bottom pieces of the base before we work our way to the top. The MultiCam Robot Man is also proceeding. I'll be posting the progress on him soon. Stay tuned...