WELCOME!


It is hard to believe that it was almost ten years ago I witnessed a CNC router in action for the very first time. I was fascinated with what I saw and simply had to have one! Although I had been in the creative end of the three dimensional sign business for most of my life I didn't really know what I would do with one - but I just knew it could do fantastic stuff.

Through extensive research and LOTS of hands-on practice I quickly found out that my MultiCam router was capable of just about anything imaginable.This journal will chronicle that journey to date and continue each week with two or three entries as I continue to explore just what is possible with this wonderful tool... -dan

Thursday, March 31, 2011

BLUE SKY!

'Blue sky' is a term in the theme park world that defines ideas and concepts that are brand new, still very much in the development and exploratory stage. Anything is possible at this early level. It is all about the ideas and what might be. It's a fun period for any project. 

Five and a half years ago we made the plunge into the CNC routing world with a MultiCam 3000 series router. It was quite the leap of faith and it has been an incredible adventure! I've enjoyed it immensely. The range of projects we were able to do with this machine and EnRoute software has amazed even me and I had high expectations. The machine and software continues to perform well to this day. But over the last while, with the advances in technology, both machines and software, it is time to take a step forward. We've been looking hard at all the options and have decided to jump to the next level of CNC routers.

After much discussion with the MultiCam folks we have spec'd out a new router for our shop. Our old 4' x 8' MultiCam 3000 series proved to be perfect for our needs in the last five years. We don't want to change a lot but only wanted to add the fourth axis to the mix. Sadly, it was not a viable option on the old machine. So we will upgrade to a whole new machine! The picture below is of a similarly equipped plasma cutter with the rotary attachment. It has an extended gantry to allow the spindle to access the rotary bed. Our new router will be similar to this layout.


When we purchased our first router I had no clear idea of what we would do with the machine but I knew it would be an exciting journey. With the new four axis MultiCam the expectations are very similar. Only this time we will not be starting from scratch. I know what a MultiCam router and the software are capable of and now we will take that into a whole new dimension!

As we wait for the delivery of our new machine my mind of course begins to race ahead, thinking of what we will be able to do. As with the first machine my plan is to first do a variety of samples and experiments to see what is possible and to struggle through the inevitable learning curve. I am not going to schedule customer's work on the machine until I am comfortable with the process. It's the same tack we took with the first machine and I believe it allowed us to go further, faster than if we tried to straight into production with the new found technology.

Happily we will be working with the folks at EnRoute to both develop and fine tune the fourth axis capabilities. I have a big shopping list of things I would like to be able to do in the future and I have no doubt it will all be possible. This is going to be exciting!

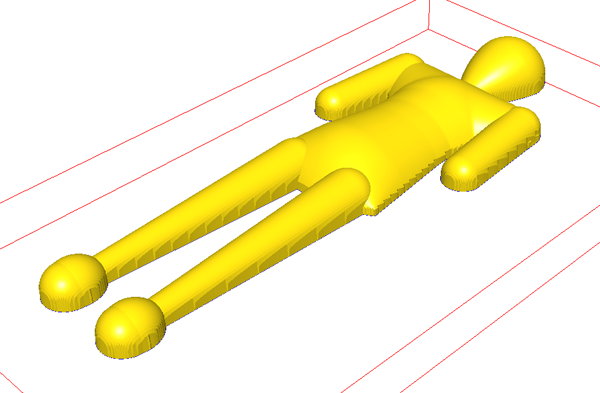
As I lay awake dreaming of the new router I pondered what the first project should be. I decided an airship was just the ticket to some fun! Most than twenty years ago I built a model of an air ship using a lathe which was the most modern tool I had at the time. It turned out good but was very stiff looking to say the least. But there were some good ideas there.


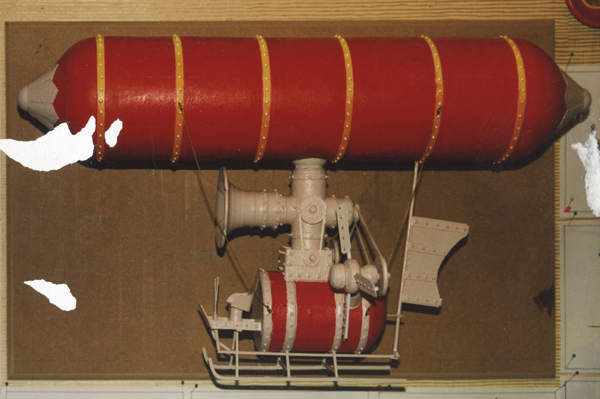
That early model inspired a large as life project at Professor WEM's Adventure Golf at West Edmonton Mall a decade later. Amazingly it was constructed of sculpted fiberglass-reinforced-concrete over a welded steel frame, making it the heaviest lighter than air craft ever assembled. It still stands there today.


Back in 2002 we seriously considered expanding Giggle Ridge Adventure Golf www.giggleridge.com and as part of that plan we were going to do a railroad which circled a small mountain. Our house and studio would have been hidden inside the mountain. On one side of the mountain a hot air balloon was to have been tethered in a hanger. I built a quick model at the time but never finished it. The model was only used to help me with the perspective for the concept drawings for the plans.


So as I lay awake last night I knew exactly what the first project that would be done on the four axis machine...   This morning I dug through my archives and found the drawing I was looking for. Over the next time, while I am waiting for the manufacture and delivery of the new MultiCam machine I'll be working on the modifications, plans and files. It is BLUE SKY TIME!


This is going to be more fun than ever!

 -dan

Wednesday, March 30, 2011

One down one to go...

I really love how EnRoute software and the MultiCam take the grunt work out of the projects we do these days. With the designing and the routing out of the way it is time to get down to the really creative end of the project. It didn't take long to squeeze on a rough coat of Abracadabra sculpting epoxy and then do another detailed layer. I worked from his 'steel' boots upward. The idea here was to not get too caught up in detail but rather create the illusion of detail. I also wanted plenty of texture left on the surface so it takes glazes real well. He has to look old when we are done.


Here's a comparison of the two knights, one still largely bare Precision Board and the other one with the sculpting process finished.  A quarter inch steel rod made for a perfect lance shaft.


And as always I had to place him into position to check out how things will look when they are all done.


The sign will hang fairly high when it is done so the knight will lean slightly out, proudly standing guard over the entrance.


Tomorrow's task will be to make the second knight look like the first one...  :)

dan

Tuesday, March 29, 2011

It was a rough Knight.

 Once the clamps came off this morning I fired up the air powered die grinder and whacked off the seams. Smooth and finished simply wasn't necessary as it will al be covered with the sculpting epoxy later today. If I needed more than two copies I might consider getting a scan done of one finished piece and then route the extra copies... but with only two knights to fabricate it is simpler, cheaper and faster to do the second copy from scratch. With a four axis MultiCam now officially on the way to my shop it may time to seriously start looking at one of those small scanners...


Before I put more work into the piece I always test fit to make sure things are right. I do make mistakes more often than I like to admit. But this time everything looks great.


Now it is on to the next stage...

-dan

Monday, March 28, 2011

It was a dark and stormy Knight

The knight sign has been a little neglected while I finished off the truck signs, but today I delivered them, much to the delight of our customer. It looks like many more fun little trucks are in our future. But now it's time to get serious about the knight at last. 

I've been pondering just how I was going to build the knight. After the success of the trucks I decided I would mold them with sculpting epoxy once more... or rather construct his armor that way. The knight I would so on the MultiCam. I didn't need anything too fancy, but rather a quick and dirty body shape. I only needed the torso, head, legs and top of his arms. The rest I would model with the sculpt. Some would argue that a CNC router was not necessary for something so basic, but with the machine routing the basic shape the basic proportions it would be so much faster than doing it by hand. The chances of getting both knights the same size and shape was guaranteed this way too.

I clipped down the sign illustration and brought it into EnRoute, then used it as a pattern to create the vectors I needed. Nothing fancy or difficult here. Remember to keep the knight (or any figure you are doing) a little on the skinny side as you need to allow a little room for the skin of sculpt over the armature.

Then I used the dome relief tool set at 90 degrees to form the head, arms , legs and feet. 

The body was also done with the dome relief tool but set at only 75 degrees. I tried 90 degrees but it made it too tall. He was looking like half a man already with just a few clicks. The stiffness was appropriate for a suit of armor.


I created a zero height relief and used the merge lowest tool to clip the bottom of the spheres I had created for his feet. This made them flat in an instant.


Then I created an offset around each piece and combined the vectors. I used this shape to create a zero height relief and merged the body shape to it. Then I duplicated the body and flipped it to form the back side of the figure. This was fit inside a 2.5" board.


Then it was time to tool path the piece and send it to the router. Since it was going to only be a form over which I would sculpt the figure I didn't need detail or smoothness. I opted to route it with a 3/8" ball nose bit and a 75% overlap. Speed was more important than finish. 


In less time than it took me to write this post I had created the files, routed and glued up the basic form for the knight. This is the beauty of EnRoute software and my MultiCam. It did the hard work once more, leaving me time to do the fun and fancy stuff. You have to love that!


Tomorrow afternoon we'll put some armor on this dude. Stay tuned...

-dan

Saturday, March 26, 2011

Truckin!

The last of the paint went on the Cap-it signs this morning. I pulled them out onto the porch for some photos. They will stay there to greet the client on Monday morning as he drives up. I am more than pleased with the results of our work. The catalogue display/stands turned out to be everything I imagined. Hopefully the client feels the same way.

I would have a hard time choosing a favorite between the two pieces as each has it's charms. Working on the little Jeep got me wishing I had a full size one to tootle around town in. Perhaps some day...


The little Pickup reminded me of my hot rod days and the vehicles I built in my youth. I enjoyed adding the many details and needed no reference material as I was very familiar with similar vehicles.


The result of my labors reinforced my desire to do more of this kind of work in the future. As people see the displays some will undoubtably want a similar sign for themselves. There is only one place I know that can design and build this kind of sign. I'll be waiting for the call...

-dan

Wednesday, March 23, 2011

Beautiful body

Our EnRoute Software and the MultiCam router are powerful tools which I use extensively in our work. They make things easier and speed it up considerably. And while I would never want to give them up I also like to do some things by hand. Sculpting the body of the truck is a good example of how we combine modern tools with old world skills. And while I use Precision Board for the bulk of this project, a thin layer of Magic Sculpt give me the easiest way to finish this job. It shows the best of all worlds. The truck came off the router and required a little hand work with the die grinder to get it into the rough shape I needed. Hand work was limited to about 30 minutes after gluing the pieces right off the MultiCam.


Then it was time for some old fashioned hand sculpting. I use Abracadabra Sculpt in our shop. It dries rock hard in about three hours. It is the perfect medium for my slightly bent, cartoon style of work which is difficult to mimic with a machine alone.


I worked on the cab from the top down, then worked around the front of the truck and did the box (the easiest part) last. I did it this way because it was easiest to hold still there without fear of damaging the freshly sculpted parts. For the seam lines like the doors and hood I used a sharpened, wooden stir stick.


The truck is definitely hand sculpted and looks like it has been well used through the years. The paint job will feature lots of weathering and dirt to enhance this look to the max. The end result is a truck with a lot of character.


Tomorrow I begin the final paint and assembly at long last.

-dan

Tuesday, March 22, 2011

Coming together...

I finished the second chassis detail yesterday. This morning Kirsten was tasked with putting on a coat of paint.


While she labored on the painting I finished roughing out the body of the truck. I had done one half before the Sign magic Workshop a couple of weeks ago. I had left the second half as it had been assembled after routing. The hood line had been marked out.


The first job was to remove the screws as I would be cutting into these areas with the die grinder.


Then I rounded off the corners quickly and shaped them to match the first side. Even though the 30 lb Precision Board is pretty tough it didn't take long - about 15 minutes per side. I then measured and drilled in two holes for headlights. I inserted two 1" dowels.


The I pressed on and smoothed out a thin coat of sculpting epoxy over the headlights and windshield area and put on the center bar of the windshield. This would make it easier for the parts that come tomorrow.


As always I mocked everything up to check progress. The sign owner was sent a copy of progress via email as well. I know he is anxiously awaiting their completion.


The trucks are now much closer to the final look. Tomorrow will be a big day with lots of visible progress, seemingly in an instant.


Tomorrow night we will be down to final paint at long last.

-dan 

Sunday, March 20, 2011

Laminating a structural steel frame inside a sign

The Black Forest Steak House sign is now in full production in the shop. The design was done just before Christmas but didn't get the green light and deposit until a month ago. Then it had to wait for it's turn in the cue. The MultiCam has been busy for a long while.
The sign was routed in seven layers of Precision Board. The two main faces and the top trim were from 2" thick material, while the balance was done using 1.5" thick material.


As soon as they came off the router I mocked them up to see how it looked together and to let me plan an idea of how I was going to put it together and also to measure up for the knight who would be the next phase of the project.


We leaned the signs pieces on my truck and then gave them a good pressure wash to get rid of the fine dust that would prevent a secure gluing. Cody is my new part time helper and he did a wonderful job! We bundled him up with rain gear before we started to keep him dry and warm. Cody washed the in between truck parts when the signs were out of the way.


The first order of business was to weld up a rectangular steel frame that would be laminated inside the sign. I cut out half round shapes by each location for the mounting studs. This gave me room to weld the bars in place in situ after drilling holes from the sides to insert the solid steel rods.


I used plenty of countersunk screws to hold the many layers together until the glue dried.


I'll even up the edges if the signs with the die grinder while it is still on the table, then weld on the bracket so I can temporarily fasten the sign to a temporary stand in order to work on it safely. The knight will be a combination of routing and sculpting.

-dan 

Thursday, March 17, 2011

Blizzard in the shop!

The local kids are on spring break in these parts and so my grand daughter Phoebe and her cousins are visiting for a few days. My work is always fun, but even more so when the kids are helping. And what could be more fun than generating a blizzard in the workshop?


We went over tool safety and outfitted the gang with safety glasses and then let everyone have a turn - with me very close by - just in case. The oldest child (14) was dubbed official photographer. 


 In less than 20 minutes we had scattered styrofoam bits from one end of the shop to the other - and all over ourselves too, much to the delight of Phoebe. I did the last tweaking of the design to make sure everything looked like rocks.


Tomorrow we will finish coating everything with the sculpting epoxy after getting a good start today.

If you looked closely in the background of the above pictures you would have caught a glimpse of the next routing project to be done.  Stay tuned...

-dan


Tuesday, March 15, 2011

Stick with me...

When I did up the jeep I neglected to get pictures of the blocks of foam after I had glued them up. With the truck I took the time. I had some bits of 2" and 1.5" blocks tucked away in the storage area... saved for just such a project. These were glued on using PL3000 a construction adhesive designed for foam. It doesn't eat into it. I pinned the blocks of foam to the wood box and to each other with some screws. Otherwise they tend to slide out of position.


Once the glue dries these blocks will be carved down to rock shapes using a hot wire rig and my die grinder.


Then I gave the foam a rough coat of sculpting epoxy ( www.abracadabrasigns.com ) followed by a final coat into which I carved the detail. The rough rock texture was achieved by pressing in some crumpled, heavy duty tinfoil. I let it cure overnight and then applied a base coat of acrylic paint.


While the paint dried I sculpted a few more details on the jeep. The windshield 'glass' is a piece of lexan cut from a face shield.


Then it was time for some more paint fun. I enlisted the help of my ten year old niece (who is staying with us for spring break) to help me out. Then painting out of three different colored buckets of glaze I started slopping on the color. Recessed areas got the darkest color. We sloshed on the paint, spritzed with a water sprayer, and toweled things off wit ha shop rag. It was glorious fun for about twenty minutes as we made it look like rock. My m=niece thinks it is more fun than watching cartoons!


While we were busy on the rocks my older niece had put the first coat of bright yellow paint on the jeep. With the rock and undercarriage of the Jeep done I glued the wheels permanently to the steel studs sticking out of the rock. The body still lifts off until it is done.


This project is coming together quickly now... 

-dan