WELCOME!


It is hard to believe that it was almost ten years ago I witnessed a CNC router in action for the very first time. I was fascinated with what I saw and simply had to have one! Although I had been in the creative end of the three dimensional sign business for most of my life I didn't really know what I would do with one - but I just knew it could do fantastic stuff.

Through extensive research and LOTS of hands-on practice I quickly found out that my MultiCam router was capable of just about anything imaginable.This journal will chronicle that journey to date and continue each week with two or three entries as I continue to explore just what is possible with this wonderful tool... -dan

Saturday, November 16, 2013

Installing the lighthouse

The main sign at the Cultus Lake Adventure Park is anything but ordinary. The sign lettering is routed from Precision Board and assembled with a sturdy frame as are many of our projects. But the lettering is only a teeny part of the sign. The lettering attaches to a giant faux wood background which is stuck into a giant 'dirt' bank. An assortment of colorful plants will grow in the giant top planter. Since the sign is perched on the side of a huge bumper boat pool we designed in a very tall lighthouse and a waterfall that splashes into the pool below. All in all it makes for a sign that is impossible to not take notice of.

Yesterday was the day we would install the lighthouse portion of the sign, made from steel and concrete like many of our sculptures. The first job was to get the heavy pieces out of the shop. They were too tall to put the forklift inside the shop. We would instead drag it from the shop with our trusty little tractor. As designed there was only a bit of clearance under the door frame.


Once outside we could use the forklift to put the pieces on the trailer. I bolted custom made steel jigs to the top of each piece to facilitate to make it easy to tie the pieces in place for shipping.


Once onsite we used a big tired zoom boom to transport the pieces to the front of the property and set them into position. A crew huddled inside bolted them securely in place.


Then it was time for the last big lift - the top section. It too was lifted and carefully positioned. I was up in the basket of the snorkel lift to tighten the bolts on the upper piece. 


Once everything was secure we unclipped the chains, unscrewed the eye bolt and turned in the goose weathervane.


The construction site was instantly transformed into the beginnings of an exciting and colorful theme park. Late this week the sign faces will be installed, finishing off this first piece save for a little final painting and the installation of the strobe light in the cupola when the weather warms up in spring.


It's a fun process to watch unfold on a daily basis. Stay tuned for more...

-dan

Building a sign in layers to hide the frame

On the sign I last posted I forgot to take pictures of the assembly process, but luckily there was a second identical sign. Since I designed the signs to slip into the framework of the lighthouse sign they needed four legs to protrude out of the back. The signs are routed in three layers with the center one inch thick layer having slots in to to accommodate the framework. With the sign face down and the second layer in place I put the pieces of steel into the slots and tacked them up. This made things real accurate. I then put in some temporary spacers and set the back of the sign on those. The short pieces of square tubing were then dropped through the  3/4" thick sign back holes and welded into place. Once the frame was completely welded up I cleaned the layers up and put it back together one last time only with one part PB Bond 240 (Coastal Enterprises)- a one part urethane glue that is activated with a spritz of water.  I then used screws and clamps to keep everything in place - FOREVER.


Once the glue was dry I used my die grinder to even things up and remove the excess glue from the edges. A subtle texture was added to the sign edges and back side at the same time. Some Abracadabra sculpting epoxy was used to fill the screw holes.


I also welded up a quick holding stand that will safely and conveniently hold both signs (back to back) for painting and transport.


The signs are now ready for painting. They will be hung in place onsite late next week.

Stay tuned for the next sign that is already in progress...

-dan

Wednesday, November 13, 2013

Sign lettering

The sign lettering was routed in three pieces... the face, routed from 2" thick 30 lb Precision Board, the middle (which houses the structure) routed from 1" thick material, and the back which is routed from 3/4" thick material. The sign face was routed in two passes, the first as a rough pass with a 3/8" ball nose bit. The final pass was using a 1/8" ball nose.


I welded up the frame to fit inside, with the four legs sticking out of the back and then glued everything up.


A little bit of hand work on the edges and to clean up the glue lines and this piece will be ready for paint. Stay tuned...

-dan

Tuesday, November 12, 2013

Designing sign hanging hardware

When I welded up the frame for the lighthouse mountain and sign I welded in four inch and a half square tubes that stood out from the finished sign face. These were to fasten the lettering to when we routed it from Precision Board. 


The lettering vectors looked  like this. I combined them to form the outline of the sign.


Then I combined the shapes to form the outline for the back layer of the sign. I also added four small squares to accommodate 1" square tubing that would protrude out of the back of the sign. The square tubes would slip into the square tubes on the mountain sign face.


The inside layer of the sign would have a space routed into it to accommodate a 1" square tubing frame. This would give the lettering shapes stiffness and provide structural support. This framework would also line up with the tubing that will stick out of the rear of the sign.

Tomorrow I'll post some pictures as I weld up that frame and assemble the three layers of the sign.

-dan

Thursday, November 7, 2013

Installing Bucky

The Bucky's Bumper Boat sign was finished the day before yesterday and with the room needed in the shop it was time for the install.


 We carefully loaded it in the trailer and hauled it up to the work site. Our client had all the big equipment we needed to the tricky install. All we had to do was unload it and hook it to the zoom boom. The skilled operator shifted the machine into four wheel drive and low range to begin the install.


He skillfully maneuvered it into position and then louvered the sign onto the sleeve we had fastened securely to the wall previously.


Once the sign was in position vertically we welded it securely in place


Once the sign was secure it was a simple matter of unhooking the chain, unscrewing the eye bolt and heading back to the shop to work on the next piece.


We'll be applying the fiberglass reinforced concrete and carving the woodgrain into the post as soon as the railings are welded in place. I'll post another picture then.

-dan
Wednesday, November 6, 2013

Building the primary sign routing file

I started design for this project about four months ago. The sign was to be a teeny part of a very large project - an entire theme park. My client approved the design of the sign holder (the waterfall, wood base, small mountain and the lighthouse but wanted a rethink of the actual logo. His fear was that it was too childlike and not appealing enough to a broader and age varied demographic. He asked that we drop the ferris wheel and bear and revert to just the lettering.


 While we were at it I wanted to revisit the whole look of the logo. My concern was that my client loves to use big bill boards with photo backgrounds. These often are very busy. That meant the logo had to read well no matter where it was used. Wide, layered borders around the primary lettering and a plain banner with the words adventure park were the answer. My client agreed. Now at lst the sign is ready for routing.


Once we had a logo I imported them into EnRoute and our work building the routing files began.


This project was super simple, as it is just a whole bunch of layers. Rather than build them separately I like to whittle everything from one block. There is no failure of delimitation or lettering falling off that way. I selected the outermost letting outline and created a flat relief 0.5" tall.


Then I modified the relief by adding another layer using the next inner border. This was raised 0.3".


The next border was then added in the same fashion.


And then it was time to add the lettering, this time at 0.4" high. The inside of the letters was then lowered by using the subtract function at 0.2".


Then I built the banner below as a separate relief 1.3" tall. The two reliefs were then selected and by using the combine function (MERGE) they were made into one.


Lastly I modified the base relief using the lettering vectors. I uses the dome tool to create slightly rounded letters. As quick as that the file was ready for tool pathing.


Next time I'll show how we build the files to accommodate the secure mounting hardware. Stay tuned...

-dan

Monday, November 4, 2013

Ready for Bucky

The day dawned bright which meant the entire crew headed off to the worksite. Lots was accomplished there! Back in the shop the Bucky sign awaits the painting of the lettering to make it ready to install. That install will happen later this week.


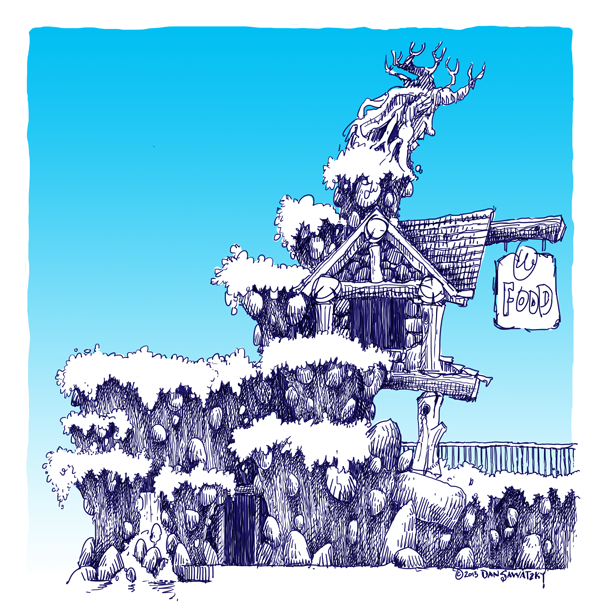
The shop is very full these days with some large pieces that will soon form the top of a mountain that will envelop a whole three story building. We started with a concept drawing. There would of course be many changes as we went through planning and construction but this drawing set the tone of everything to follow.


The architect drew up the plans which then came to me for comment. I made a few changes and sent them back. I also made some quick sketches of the structural framework we would need which were reviewed by the structural engineer before going to the steel fabricators. 


When the steel was delivered to our shop we set to work forming and welding up the pencil rod frame over which we will now fasten the diamond lath. We'll add a layer of concrete into which we will sculpt the details. Then we'll paint it up to ready it to be craned up to the peak of the roof. The tree is being built as a separate section. It will go way up on the tippy top.


The eastern side of the mountain will form a backdrop for the bumper boats and swing ride. The opposite side will house the concession where all of the cool signs will be. 

It's going to be an exciting week.

-dan