WELCOME!


It is hard to believe that it was almost ten years ago I witnessed a CNC router in action for the very first time. I was fascinated with what I saw and simply had to have one! Although I had been in the creative end of the three dimensional sign business for most of my life I didn't really know what I would do with one - but I just knew it could do fantastic stuff.

Through extensive research and LOTS of hands-on practice I quickly found out that my MultiCam router was capable of just about anything imaginable.This journal will chronicle that journey to date and continue each week with two or three entries as I continue to explore just what is possible with this wonderful tool... -dan

Tuesday, October 10, 2017

Tank turret


The next part of the tank we are building is the main turret.  It is pretty simple but it uses tools in ways not often done. The turret is built in two pieces - an upper and a lower half.

The first step is the create a relief using the bevel tool, but we'll do it with a twist. That is to use the limit to height tool which effectively flattens the top with a nice bevel around the edge.


The gun barrel mounts to the front of the turret and so we needed to build a box on the front. This is done as a separate relief. I made this 0.8" tall - just like each half of the turret.


The gun mount relief were then combined with the turret reliefs.


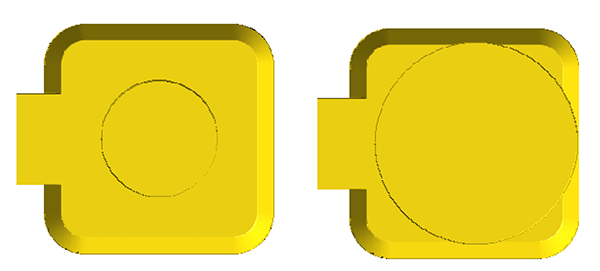
The two halves of the turret then got a round modification by using the ADD TO RELIEF command using the two circles as masks. These reliefs were created separately and then merged highest with their respective halves of the turret. The large circle is the top portion. We'll build a hatch onto it shortly.


That's all I can fit on this post but next time we'll build the final bits to get this ready for routing.