There's only seven weeks to go before the 2016 Sign Challenge in Orlando at the International Sign Association Expo. I'll bet there are a bunch of sign makers now scrambling to finish designing and building their entries. Peter and I were a little smug in the knowledge that we had our entries ready to go for some time now.
Then I talked to our friends at Coastal Enterprises. I promised a piece for their display at the show. As I thought about what to create a fabulous idea popped into my head. It wasn't suitable for their display but it was an awesome idea for the Sign Challenge. I decided I would give them the piece I had made previously. It was made largely using their product and it would be a good tie in to the Sign Challenge.
That meant I had to get busy on the new piece for we will be shipping them out in the next ten days. Why is this new idea??? Stay tuned to the blog over the next week and it will be revealed....
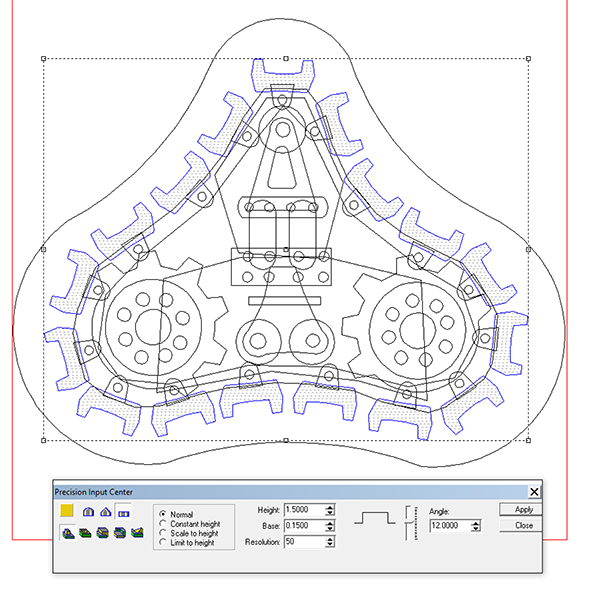
I started with a vector drawing - all done in EnRoute. It is a heavy machine track. The build looks complex but in reality is a simple matter of creating individual reliefs of different heights and then combining them at the end.
The track cleats were first. I made the flat reliefs 1.5" tall.
Then the joining bracket relief was created as a flat relief at 0.7" tall.
The joining brackets were then modified using the dome tool to add the rivets.
I forgot to grab a screen capture but the next step was to create a slightly lower relief of the heavy connecting piece which went around under the tracks. I then merged the pieces together.
I then built the gears and various other pieces in the same fashion, modifying the base reliefs to add details. When all of the pieces were done I creates a larger zero height relief and MERGED HIGHEST all of the pieces to it.
I then created a copy of the finished relief and flipped it. The one on the left is the inside of the track. It has a 1.5" rectangular relief merged highest into the centre. This will be used to mount the track to the centre portion of the vehicle.
I then tool pathed the relief and sent it off to the MultiCam. Two copies of each piece were routed from 30 lb Precision Board.
This morning I glued and clamped the pieces to form two vehicle tracks. I used Coastal Enterprises PB Bond 240 glue.
Now the fun begins! Stay tuned....


