
I find it both challenging and fun to build complex shapes in EnRoute. Once you can get your mind around what the program does, and how you can combine shapes by adding and subtracting it become much easier. The blunderbuss for the Fox & Hounds Restaurant was just such a challenge. I'll go through the step by step below... but I don't recommend tackling something like this until you have a good grasp on the basic steps. As with all my projects it starts with a concept drawing. This was done in photoshop.

I imported the drawing as a jpg file into EnRoute, then traced the vector shapes I needed by hand. I wasn't worried about getting things exact, but rather more interested in establishing the overall shape. I wanted to use my MultiCam to create the basic shape - not finish the file as the smaller bits would be done with Abracadabra Sculpt over a welded steel frame. Since I was going to be sculpting some parts anyway I decided to make some compromises in the file in the interest of saving time at this stage. Strength will be important for this thing to last where it is going to live as it is within grabbing distance.
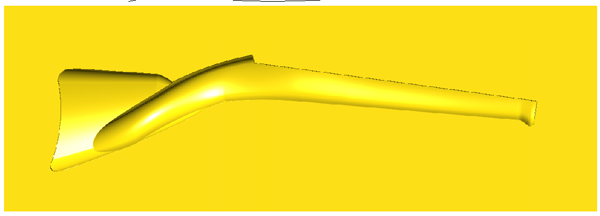
After considering and even trying some other ways of building the gun using only reliefs I decided that the sweep two rails tool was a much better bet. The two rails of this portion of the gun are between the green lines which are the sweep sections. I used a different shape on each end of the butt end of the gun.

The result is as shown. I repeated the same procedure with the bottom of the gun stock.


At this point I created a zero height relief using the rectangle shape. The meshes were created using sweep two rails once again. The meshes were added to this shape using merge highest command. I selected the smooth relief and merge highest for each shape as a separate operation. Then I created another zero height relief and used it to cut the end of the gun to the correct shape by using the merge lowest command. A third zero height relief was created and used to cut the top of the gun stock off in preparation for the barrel.


The meshes are red when rendered, green when selected and black when not selected or rendered. Once I had them sized and placed correctly I combined the meshes with the relief using the merge highest command. I also build a flat relief with bevelled sides to mount the trigger mechanism on when I sculpted later. This relief was floated into position and merged with the base relief using the merged highest command..


I then created another smaller zero height relief that was a little bigger than the blunderbuss. I merges the completed gun to this using the merge highest command. The previous base relief was oversize and would have wasted too much material when routing.

Then I used the slice command to cut off portions of the gun that didn't fit within the 1'5" 30 lb Precision Board I would be using. Since I could sculpt these bits faster than I could route them I simply deleted what was too high.

Then I created a second copy of the blunderbuss, flipped it and positioned it for maximum use of my board. The file is now ready for tool pathing and sending to the router.

Stay tuned to see it come together.
-dan