Back when I started with my MultiCam and EnRoute my first project was a whole alphabet of letters. Each letter sample was in a different style and featured a different texture. The project was not for a customer - but for myself. The purpose was many fold. Making 26 different letters would force me to be creative. It would make me think. It would teach me exactly how to create textures in EnRoute. Twenty six different projects would of course teach me how to run this seemingly impossibly complicated machine. The samples would allow me to experiment with various paints and color combinations. And the samples would look good on the wall, hopefully enticing prospective customers to want some of what they saw on their signs. The samples did all that and more.
In our workshops this is the type of project we learn on. I show, step by step just how it is done. Then I guide each student through the process. And then we go out in the shop and practice painting the samples. What took me months to figure out we seek to squeeze into three days. In six short weeks the first of the Sign Magic Workshops will start in mid-August at MultiCam in Toronto, Ontario, Canada. Next, during the first week of September I will be jetting off to Kiev, Ukraine. Then at the end of September I am back here in my studio to host our eleventh Sign Magic Workshop. A week later we will host our first Sculpting Magic Workshop that will feature methods and materials like we are using at the Fox & Hounds pub. In the first week of November we are heading to MultiCam, Orlando, Florida for a Sign Magic Workshop there. It promises to be a busy summer/fall!
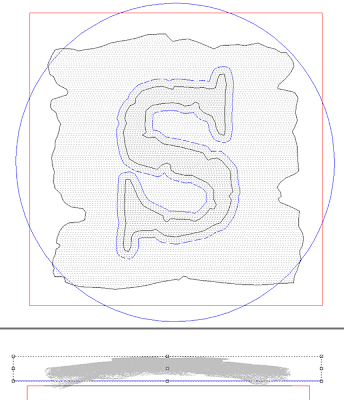
But back to the subject at hand... the letter 'S' on a piece of 'driftwood'. We will be using the driftwood bitmap texture from my TEXTURE MAGIC collection. The vectors were first, traced by hand over the driftwood bitmap texture. The letter 'S' was also traced freehand, purposely making it jagged, somewhat similar the Pirates of the Caribbean font. I then created an offset border vector around it. Like the last letter sample the file would be about 7.5" square and 1" thick.
I selected the outside 'wood' vector and used the dome tool to create a shallow relief about .3" thick on the sides. Because of the irregular shape it creates some funky creases, but since this will be a piece of rough driftwood it does not matter.
I then imported the driftwood bitmap and laid it over the relief. Selecting both the lights up the apply bitmap to relief button. I entered a value of 0.2" and then hit apply. When I rendered it the file looked like this in the top view.
Then I used the 'edit the relief tool'. The tool icon looks like a brush. I used the round brush and quickly drew in from each side along the deepest creases. This instantly carves into the surface, leaving the grain intact. It is pure magic! When I was happy I hit reply, making my changes permanent.
Then it was time to add the 'S'. I created a flat relief with the 'S' border first, then drew a round vector around it. I would use this vector to modify the relief using the dome tool. This would shape it to match the top of the driftwood which was also rounded. I then used the up/down keys in the front view to position it in relation to the driftwood. Once I was happy I merged it to the driftwood.
Lastly I added the letter 'S' using the bevel relief tool. The base (sides of the letters) goes straight up first ( 0.15" ) and then are angled at about 15 degrees. This makes for a nice looking bevel that is easy to paint.
Then I duplicated the file six times to create the final routing file.
Stay tuned for the next two tutorials in this series...
-dan


